How to use email on Windows 8.1
Windows 8.1 comes with a new Mail app that you can be used with some of the more popular types of email account. This guide will explain how to set it up and use it.
![Inbox on Winsows Mail]()


![New message box in Windows Mail]()


![Attaching an image to an email]()
![Camera roll]()
![File attached to email]()
![Attached photo]()
![Save attachment in Windows Mail]()
![File Explorer icon]()
There are three different types of email account – POP (Post Office Protocol), IMAP (Internet Message Access Protocol) and EAS (Exchange ActiveSync). Windows 8 Mail works with IMAP and EAS. If you are not sure which type of account you have, you should ask your email provider for advice. If you know it is a POP account, you could ask them whether it would be possible to change your account to IMAP.
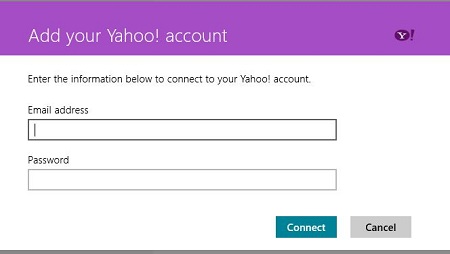
Note that the Mail app does not work with Yahoo accounts so with those you would need a different program e.g. Windows Live Mail, or you can download a Yahoo Mail app from the Windows Store.
Please note that you cannot use the Mail app with BT Yahoo email accounts. Instead, you could use another mail program e.g. Windows Live Mail, Outlook or Thunderbird.
You’ll need:
- A computer with Windows 8.1 installed
- Internet access.

Follow these step-by-step instructions to set up email on your Windows 8 machine
Step 1: Click the Mail tile on the Start screen. (See right)
Step 2: If you use your email address as your Microsoft Account, and sign in to the computer with this, your email will already be set up in the Mail app so you’re ready to go.
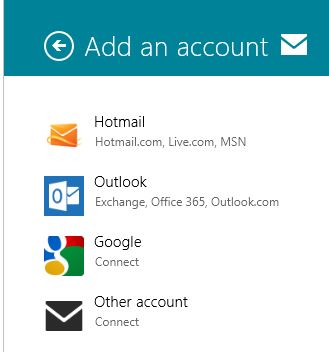
Step 3: Choose Add an account and choose from the type of accounts listed or, if it isn’t there, choose Other account.

Step 4: Now type your email address and password into the boxes.

Step 5: That’s it! Mail should now open and show you your Inbox with the messages you’ve received in the past two weeks.
Your Mail inbox
The first column shows your email folders. Click on any of these to see a list of messages in the middle column. Click on a message to read it in the third column.
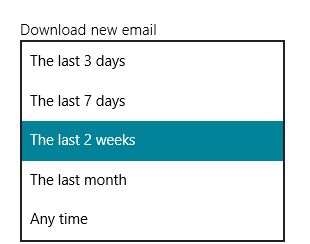
Step 1: To see messages that are older than two weeks, click go to Settings. Under Download email from click the arrow to see a drop down list to choose from. Click to choose, wait a few seconds and you should see more messages appear in the Inbox.

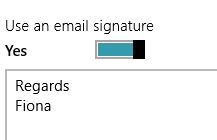
Step 2: You can also change other settings such as your email signature. This is set to ‘Sent from Windows Mail’ but you can delete that and type your own into the box. This text will then be automatically inserted at the end of all messages you send.

How to reply to an email

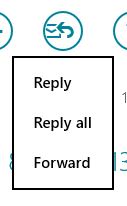
Step 1: To reply to a message, click the Reply icon. (See right)
You will see three options – Reply, Reply All and Forward.

- Choose Reply to reply to the sender.
- Choose Reply All to reply to the sender and all the recipients of the original message.
- Choose Forward to send the message on to someone else.
How to send an email
Now you are all set up, you are ready to send your first email! Mail refers to emails as ‘messages’.
Step 1: To send a message, click the + in the top right hand corner of the window.

This will open a new message window.
Step 2: In the box next to 'To' type in the recipient’s email address. If you already have some contacts set up, you will see a list to choose from – click to choose.
Step 3: In the Cc (carbon copy) box, you can type the email address of anyone else you would like to send a copy of the message to. If you wish to use Bcc (blind carbon copy), click Show more. Any email addresses you add in this box will be invisible to the other recipients.
Step 4: Click Add a subject to type a subject for your message.
Step 5: Click Add a message to type your message.
Step 6: When you are ready, click the Send icon at top right of the window. (See right.)
Step 7: To Delete a message, click the Delete icon. (See right.) ![Delete icon]()
Step 8: To see additional tools, do a right mouse click at the bottom of the window, or swipe upwards if using a touchscreen, and a Toolbar will open across the bottom of the screen. Click on any icon to use the tool.
How to attach files to your email
Step 1: To add an attachment, click the paperclip icon.

Step 2: It will now ask you to choose the folder in which that the file is saved. In the screenshot, there is one folder in the Pictures Library called 'Camera Roll'. To go to a different Library, click Go up.
Step 3: Click the folder name to open it and you will see your files. Click a file to select it and click Attach at the bottom of the window.
It will now show you your message with the file attached. You can now finish your message and click Send.
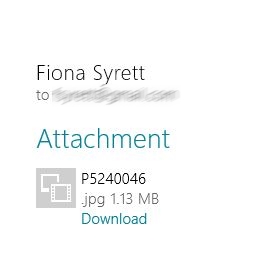
Step 4: If you receive a message with an attachment you will see an icon at the top of the message and a ‘paperclip’ next to it in the list.

Step 5: When you click the icon, the file will open. If it is a photo, click or tap it to see icons for various options at the bottom of the screen
.
.
You now have three options:
- Open – to open the file to view it.
- Open with – to open the file with a program or app that’s installed on your computer.
- Save – to save the file in the appropriate Library.
Step 6: To save the file, click the Save icon.
- A window will open showing the folders available in the appropriate library. If you want to save the file in one of your folders, click on it and it will open.
- To choose a different Library, click Go up.
- At the bottom of the window is a white bar with the file name in it. Type a different name if you wish.
- Click Save.
To find the file in the future
Step 1: Click the Desktop tile and click the File Explorer icon (see right) in the Taskbar.
Step 2: Double click a Library to view the files within it. Photos can also be viewed by clicking the Photos tile on the Start screen.


0 komentar: