
How to use a memory stick
USB memory sticks, also called pen drives or flash drives, are becoming more and more popular for the temporary storage and transfer of large amounts of electronic data. They should not be used as main data storage or to make permanent backups. This guide will help you understand how to use and look after your memory stick so as to ensure its effective and safe use over a long period of time.
You’ll need:
- a computer
- document(s) saved on your computer that you want to save to an external drive
- a memory stick.
This guide is based on a PC running Windows 7, but the steps in this process also apply to XP, Vista and Windows, and are very similar for Mac users.
Follow these step-by-step instructions to use a memory stick
Step 1: Firstly, you need to insert the memory stick into a USB connection port on your PC or laptop. Most USB connection ports can be found on the front of PCs,
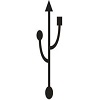
to the side or at the back of laptops, and on some monitors and keyboards. To find the correct port look for the USB symbol (see right).
(The memory stick can only be inserted one way into the USB connection port.)
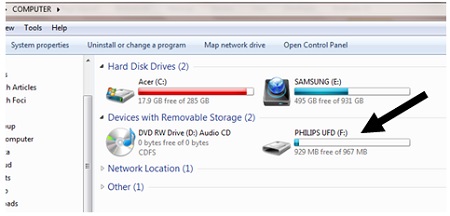
Step 2: Once the device is plugged in, if you click the Start icon, at the bottom left-hand side of the screen, and then Computer, you will see an additional drive listed under 'Devices with removable storage'.
Step 3: You can now save or copy files to your USB memory stick in exactly the same way you would do to your hard drive.
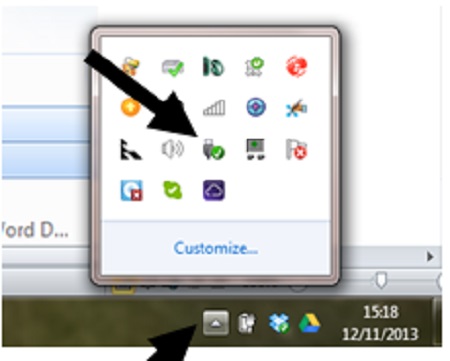
Step 4: If you unplug any storage device or removable drive from your computer while it's transferring or saving information, you could lose data. To avoid this, make sure that when you unplug your memory stick, the computer has finished saving any information to it. If your memory stick has a small light that shows when it's in use, wait a few seconds after the light has finished flashing before unplugging it. You can also check by looking for the 'Safely Remove Hardware and Eject Media' icon in the notification area, at the far right of the ‘tray’ at the bottom of the screen. This is an indication that your devices have finished all operations in progress and are ready to be removed.
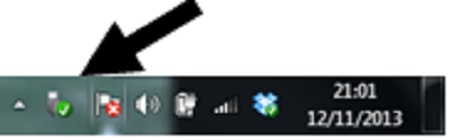
If you don't see the icon in the ‘tray’, click the Show hidden icons button to display all the icons in the notification area. To safely remove your USB memory stick, click the Safely Remove Hardware and Eject Media icon.
Step 5: A list of devices will appear. Simply click the one that you want to remove.
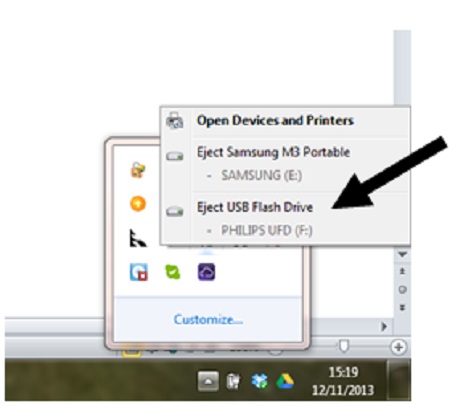
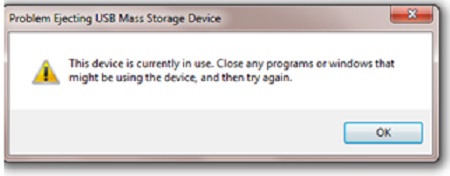
Step 6: Windows will display a notification telling you, either that the drive is in use and that you should close any programs or windows that might be using it and try again, or that it's safe to remove the device.
Note: You can also safely remove devices from the Computer folder. Click the Start button, click Computer, right-click the device you want to remove, and then click Eject.
When using your memory stick, always:
- Avoid contact with extremes of heat, cold, magnetic fields and liquids.
- Remember to use the cap to protect the electrical contacts .
- Remember to safely remove your memory stick and store it safely after use.
- Label your memory stick so it's easily recognisable as yours.
- Although memory sticks are cheap and readily available, your contents may not be! Always keep your data backed-up.
Jacklyn Williams is a Digital Unite tutor.


0 komentar: