23.09 Rizky Fauzi 0 Comments

What is Google Chrome?


Google Chrome is a web browser that's free to download from the internet. Created by the company that created the Google search engine, it's been designed to be both simple to use and fast.
 
Google Chrome's key benefits and features
 
  • Pages are quick to open and load.
  • You can search the web from inside the address bar.
  • You can add favourite websites to a folder or to the Favorites Bar.
  • If you personalise the browser with iGoogle, you can include instant information on local news, weather, sport or virtually anything else that interests you.
  • You can check your Gmail – the Google email account – from within the browser.

0 komentar:

23.08 Rizky Fauzi 0 Comments

What is Google?


Google is a search engine that can be employed to find a variety of information such as websites, pictures, maps or even just the answer to the crossword clue that’s been driving you mad all morning!
 
Google uses a computer program called a 'web crawler' that looks at the billions of websites available on the World Wide Web and examines their content to find 'keywords'. Then it indexes these to make the websites easier for the search engine to find. So if you type the word ‘holidays’ in the search box, for instance, Google will then show you all the websites with holiday information.
 
Google's key benefits and features
 
  • There's a simple search box into which you can type your query.
  • Answers are provided almost instantly.
  • You can choose to search for websites, images, news, maps and much more.
  • It will make suggestions for alternative search terms if you misspell a word or name.
  • You can do searches just in the UK or all over the world.
  • Google has also produced its own web browser, Google Chrome. The company has a huge commercial side, creating and placing the adverts you often see on websites. In addition, Google Analytics is a free service that can provide an enormous amount of information on how a website is working.

0 komentar:

23.08 Rizky Fauzi 0 Comments

How to search the internet


There are literally billions of websites on the internet, making a huge range of information available to you. However, it can be quite daunting when you’re trying to locate that one site that you know holds the answer!
 
This is where a search engine comes in. You type relevant ‘keywords’ into a search engine, which then looks for pages throughout the internet that contain those words and thus might hold the answer to your question.
 
This guide demonstrates how you would search the internet, using Internet Explorer 11 on a Windows 7 computer.
 
You'll need:
 
  • A computer, smartphone or tablet with internet access.
  • go to your browser’s address bar and type in the address of the search engine website – for instance, Google:
 
 
There are many search engines available on the internet. Here are just a few of them:
 
  • Google is probably the best-known search engine, so much so that in 2006 it became a verb in the Oxford English Dictionary!
  • Bing, Microsoft’s own search engine, is usually built into the Internet Explorer browser.
  • Originally called ‘Ask Jeeves’, it was renamed as Ask.com in 2005. It was then relaunched recently as Ask Jeeves... again! It responds to full questions rather than to keywords.
  • Yahoo! is also a popular search engine.
Using a search engine
 
Use the links above to access a search engine. Then all you have to do is enter keywords (or, in the case of Ask.com, a question) in the space provided – called the ‘search box’ – and click Search. Please see below an example of the Google search engine, using Internet Explorer 11.


For example, if you put ‘holiday’ and ‘Mauritius’ into the search box and click Search, you’ll come up with page after page of companies offering holidays in Mauritius.
 
A search engine can be used to look for products, companies, people, information, images, directions and maps. You’ll never again be frustrated by having that answer on the tip of your tongue … just Google the keywords!
 
Debbie Brixey is a Digital Unite tutor based in south London. Edited November 2015

0 komentar:

23.08 Rizky Fauzi 0 Comments

How to check your internet speed


When you sign up for broadband, your internet provider (ISP) will tell you the maximum speed you can expect. However, the reality can be quite different.
 
It’s very easy to find out what speed you’re actually getting.
 
You'll need:
 
  • A computer with internet access.
 
Follow these step-by-step instructions to find out your internet speed
 
Step 1: Open your web browser – for example, Internet Explorer 8.
 
Step 2: Click in the address bar at the top and type in ‘www.broadband.co.uk’.
 
Step 3: Press the ‘Enter’ key on the keyboard. This will take you to the broadband.co.uk website that, among much else, will check your internet speed for you.
 
 
Step 4: When the page has loaded, scroll down and click Test Your Broadband Speed.


Step 5: Click in the box next to ‘Your postcode’ and type your postcode. You are asked for this because the speed of broadband provided over a standard telephone line depends a great deal on the distance between your home and the telephone exchange.
 
Step 6: The following three boxes – which allow you to rate your ISP – are optional. Click the arrows to choose from the drop-down lists.
 
Step 7: Finally, click Start test.
 
 
The results will show you two speeds:
 
  • The download speed is how long it takes for pages to appear on your screen and to download files such as music files from the internet to your computer.
  • The upload speed is the opposite – for instance, how long it takes to upload photographs from your computer to an online photo album.
 
 
If you typed in your postcode, you should also be able to find out what the maximum speed could be in your area.
 
It’s important to note that internet speeds can vary considerably at different times of the day, so you should check yours more than once. If your internet speeds are slower than you think they should be, read our guide to speeding up your internet connection.
 
Fiona Syrett is a Digital Unite tutor.
 

0 komentar:

23.07 Rizky Fauzi 0 Comments

How to connect to the internet

Today, it’s possible to connect to and use the internet in many different ways

Internet connection graphic

In summary
  • It’s possible to connect to the internet via a range of devices these days — though desktop and laptop computers, mobile phones and tablets are the most common.
  • However, everyday items such as watches, even central heating systems and refrigerators, are now capable of using the internet.
  • In order for any device to actually get online though, requires signing up for a specialised service for accessing the internet. 
  • These internet access services are generally of two types: internet fixed to a specific location and provided by internet service providers, or mobile internet that can be used out and about, which are provided by mobile phone networks.
  • People use one or the other (or both) types of internet access — fixed or mobile — depending on the device they’re using, their immediate environment and budgets.

Read on to learn:
The two key ingredients for connecting to the internet
The range of devices that can be used to connect to the internet
Fixed internet: how it works and the different types available
Mobile internet: how it works and the different types available


The two ingredients for connecting to the internet

Connecting to the internet requires two key ingredients:
  • A device capable of connecting to the internet.
  • Access to an internet service that will allow that device to get connected.
Basically, there are many types of both of the above things. 
 
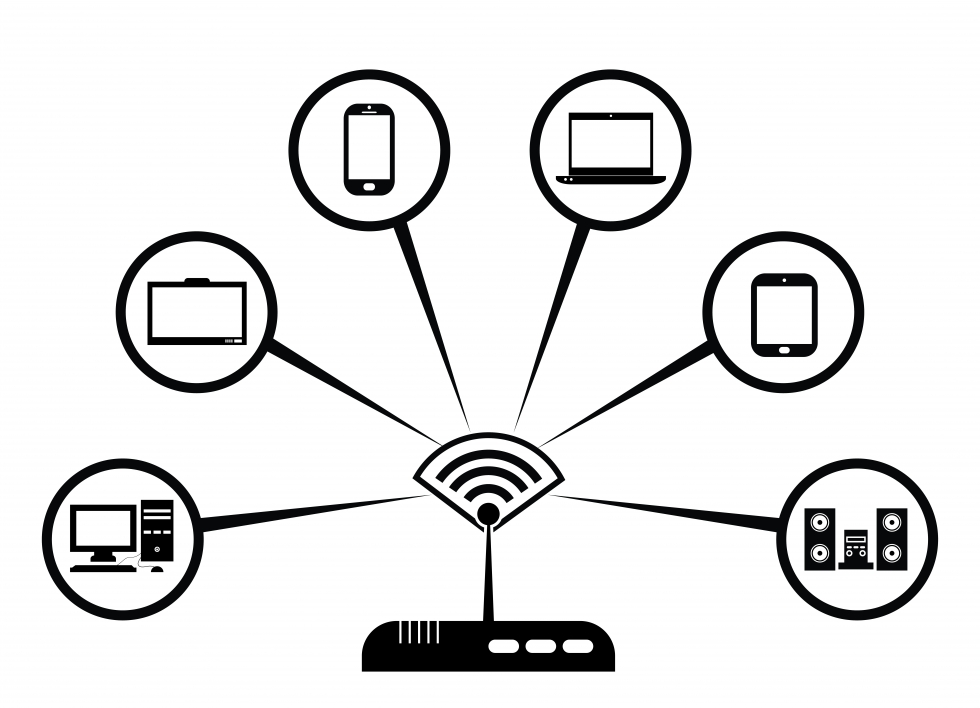
In other words, it’s possible to connect to the internet on an ever-increasing range of devices. Plus, there’s also quite a few different types of services that allow these devices to get online.
 
People’s choice over the various devices and means of getting online varies according to many factors, including lifestyle (whether they’re at home or out and about), how frequently they need to access the internet (everyday for a number of hours or just occasional use), the types of things they want to use the internet to do (catch up with email or download and watch films and tv programmes), and budget (internet access companies usually charge to use their services). 
 
Let’s unpackage the above in a bit more detail...
 

Devices that can connect to the internet

The most common devices people use today to get online, include:
  • Desktop computers
  • Laptop computers
  • Mobile phones
  • Tablets
  • E-readers
However, the range of devices capable of connecting to the internet is ever-expanding and shifting our understanding of what “being online” means.
In recent years, we’ve seen the emergence of smart watches, central heating systems, and even refrigerators, which by connecting to the internet can perform all sorts of enhanced and useful functions.
Still, the most “traditional” devices used for accessing and browsing the internet today are desktop computers, laptop computers, tablets and smartphones.

Two types of internet connection services

There are two key types of service that can provide you with internet access. They are:
  • Fixed internet 
  • Mobile internet
Let's take a look at each, in turn...

Fixed internet

As the name suggests, this is an internet connection that is fixed to a specific location (such as a home, office or shop) — meaning that the internet connection is unique to that property, and as such you can only access it when you’re physically situated there.
Today, the three most common types of fixed internet connection are:
ADSL broadband
The most widely used form of internet connection, ADSL uses a property’s existing phoneline to get online.
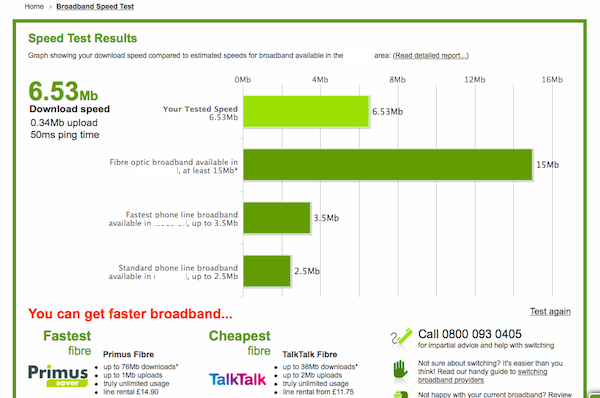
This form of broadband has been available for a while, making it often the most cost-effective way of getting online — yet not the fastest (average download speeds of 8.4 Mb) compared to the two other available forms of internet connection now available in the UK, cable and fibre broadband.
Cable broadband
Instead of using a phone line as ADSL does, cable broadband establishes an internet connection via a specialised cable that shares the same line as your TV service.
Cable broadband generally offers higher speeds than ADSL connections (average download speeds of 50.5 mb), but as a cable broadband connection is often shared with many other users, speeds can suffer from time to time due to congestion during peak times.
Fibre broadband
The most recently rolled out form of internet connection in the UK (and therefore, still not that widely available) is fibre broadband.
Fibre broadband claims to offer more consistent and reliable speeds than cable and ADSL (average download speeds of 59.4mb) — allowing multiple devices to be performing high-capacity tasks, simultaneously, without any slow downs or breakages in the connection, making it an attractive proposition for busy family homes or office environments.
Choosing a fixed internet service provider
Many companies provide installation of one of the above types of fixed internet connection, with ongoing access to the connection at an agreed speed and data usage offered, mostly on a contract basis.
Some companies are more specialised in one type of connection than another. For instance, Virgin Media specialises in cable broadband connections as it is also a TV service provider. Whilst BT, as the owner of the majority of the UK’s telephone lines, is most well-known for providing ADSL broadband — though many third-party companies are allowed access to BT’s network and offer their own ADSL broadband services. As the owner of the new infrastructure that allows for latest fibre broadband, BT is also currently the sole provider of this next-generation service.

Mobile internet

Mobile internet is a way of getting online anywhere without relying on a fixed-location connection — as the name suggests, by using your mobile device.
Mobile phone operators provide access to this alternative method of internet usage. When you sign up to a mobile phone operator’s services — either on a contract or pay-as-you-go basis — you can include access to a certain amount of data (measured in megabytes), allowing you to use your mobile device to connect to the internet within that capped usage limit.
Mobile internet is currently offered at two different speeds and capability levels:
3G mobile internet: has been around for many years and typically offers basic access and download speeds that allow users to complete basic tasks such as load a web page or access an email. 3G mobile internet is gradually being replaced by 4G services.
4G mobile internet: is the more recently available level of mobile internet available, offering much higher speeds than 3G. In fact, due to excellent connection and download speeds, 4G might eventually replace fixed internet connections in more rural parts of the country that may struggle to get access to quicker connections.
5G mobile internet: is the proposed next telecommunications standard beyond the current 4G advanced standards.

In conclusion

Here's what we've covered:
  • It’s possible to connect to the internet via a range of devices.
  • In order to get your internet-enabled device online, you need to use a specialised service for accessing the internet. 
  • These internet access services are generally of two types: fixed or mobile.
  • The device and method you choose for getting online, really depends on the type of environment you wish to be using the internet in (your home, or out and about), plus how your want to use the internet and how frequently.
So there you have it. Hopefully, this has given you enough awareness and basic knowledge to be able to make your first moves towards getting online, and using the internet. Go for it!

0 komentar:

23.07 Rizky Fauzi 0 Comments

How to connect to wifi

Wifi is a technology that uses radio waves to connect our devices to the internet — wirelessly

Wifi connection diagram

Read on to learn:

Wifi: the key benefits and the basics of how it works

The benefit of wifi is obvious: a wireless internet connection means our devices are not tied to a fixed location within a property. You see, wifi transmits a property's internet connection via special radio signals, allowing us to move around from one room to another, with no interruption to our internet connection.
This is obviously super handy for users of laptops, tablets and mobile devices. Once we're connected to wifi, access to the internet is suddenly so much more convenient and flexible.
Sunny day outside? Why not catch up on your emails whilst sipping a coffee in the garden — with wifi, you can!
The basics of wifi in summary:
  • Wifi is the wireless technology that all internet-enabled devices use to get online — without messing around with cables.
  • Home wifi internet is made possible via a wireless router, which is basically a box that transmits and receives wireless signals between an internet connection and internet-enabled devices.
  • To communicate with a router and connect to wifi, a device must have a wireless adaptor. Most internet-enabled devices today come with a wireless adaptor built in — but older computers may require a plug-in adaptor in order to get online wirelessly

General steps to connect to a wifi network near you

The following steps run through the general steps that anyone needs to take to get connected to the internet via wifi.
Step 1: Locate yourself in a property or public space that has a wireless router. I.e. Somewhere where a wifi signal is being transmitted.
Step 2: Make sure that the device you're going to use is a.) Capable of connecting to the internet and b.) Capable of connecting to wifi.
Step 3: Find out the name of the wifi network that the router in your location is transmitting. That's right, each wifi network has its own unique name. Sometimes this can be a sequence of random numbers and letters if it was set by default on the router — but people often personalise the name of a wifi network to help users identify its owners. E.g. "The Smith Family wifi" or "Fred's Cafe".
Step 4: Once you know the name of the wifi network, use your chosen device to find it. This will vary between devices (depending on whether you're using a Windows or Mac computer, or a mobile device). However, the process for connecting to wifi is broadly similar, following something along the lines of: navigate to wifi settings > turn wifi on > click on the name of your wifi network > click "connect".
Step 5: Many wifi networks are made private, with access restricted via a password. If your chosen wifi network is password protected, at this point it will ask you enter that password. Make sure you have the password at hand, and enter it.
You should now be connected to wifi!

An example of how to set up and connect to wifi at home (using a Windows 10 computer)

What you’ll need:
 
  • a wireless router
  • a Windows 10 computer with a built-in wireless adaptor or a separate adaptor.
Follow these step-by-step instructions to connect to wifi
 
Wireless router
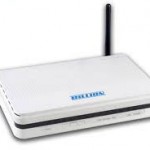
Step 1: Set up your wireless router - an example of which is on the right - (see How to connect to the internet for instructions). Most internet providers now supply wireless routers as standard. When setting up one, it’s important to provide appropriate security so that your computer can’t be entered by anyone but you. Instructions for this should be supplied with the router, but if in doubt, consult an expert.
 
Built in wireless adaptor
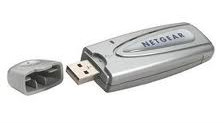
Step 2: Check that your computer has a built-in wireless adaptor (see left). Up-to-date laptops generally have one, but most desktop computers don’t.
 
To check whether there’s a built-in adaptor, follow these steps:


  • Click the Start button.
  • Right-click Computer.
  • Click Properties.
To check if built in wireless adaptor
  • Click Device Manager.
Device manager
  • Click the arrow next to ‘Network Adaptors’ to see if there’s a wifi adaptor listed.
If there is a wifi adaptor, a wifi icon should also appear in the system tray in the bottom right-hand corner of the screen. In Windows 10, 
it looks like the one on the right.Wifi icon
 
If you don’t have a wireless adaptor, you’ll need to buy one to plug into one of your computer’s USB ports. The adaptor should be supplied complete with instructions on how to use it to connect to a wireless network.
 
For laptops select the Network icon on the taskbar. The icon that appears depends on your current connection state. If you don’t see one of the network icons below or a similar one, select Up arrow icon to see if it appears there.
 
connect to wifi on your laptop
 
 
Available networks
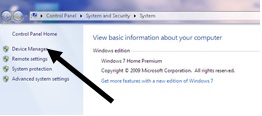
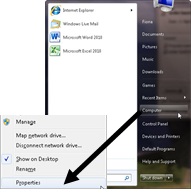
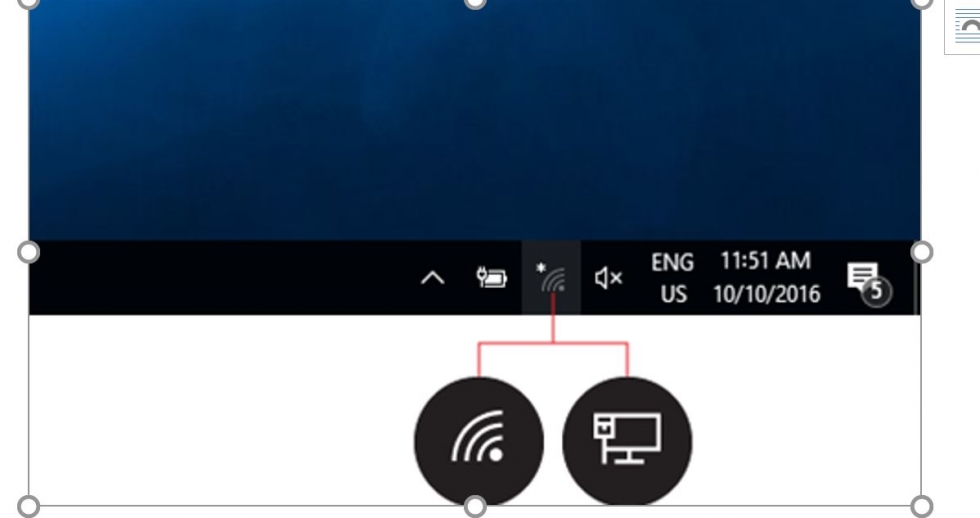
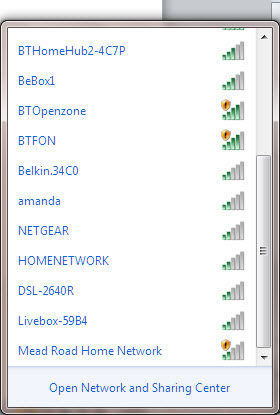
Step 3: To connect to a wireless network, click the wifi icon. You should now see a list of available networks – an example is on the left.
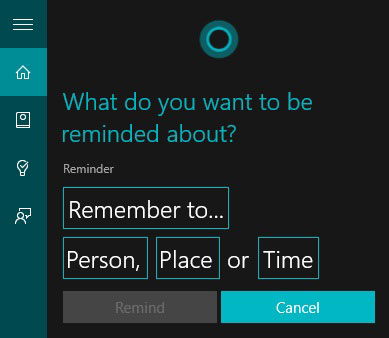
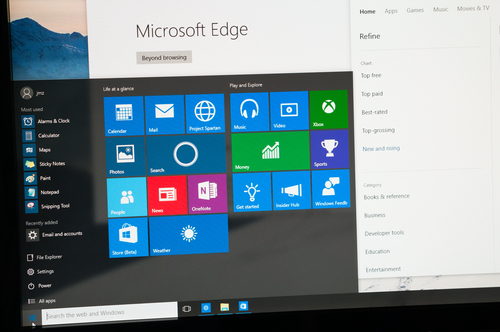
 
Step 4: To connect to a network, just click on its name. If it’s a secure network and it’s the first time you’ve used it, you’ll need a password. If it’s your home network, your internet provider will have given you a password – sometimes it’s printed on a sticker attached to the router.
 
If you’ll be using the same connection regularly, you can tick the box to connect automatically.
 
Step 5: The first time you connect to a network, you’ll be asked to choose whether it’s a home, work or public network.
 
Warning: Be very careful if you connect to unsecured wireless networks such as wifi ‘hotspots’ in public places. While on them, it’s important not to use websites that require you to enter personal or financial details as other users of the network could gain access to these details.
 
Fiona Syrett is a Digital Unite tutor.

0 komentar:

23.06 Rizky Fauzi 0 Comments

An introduction to using Cortana in Windows 10

Cortana is a clever little personal assistant that helps you to find things, complete tasks and organise your calendar


Read on to learn how to:

  • set up and personalise Cortana
  • use Cortana to set up a reminder
  • use Cortana to search your computer


How to set up Cortana
  1. To set up Cortana, click on the Cortana icon   in Start   or click on Start > All apps > Cortana. This will open up the Cortana window. 
  2. Type in the name you would like Cortana to call you by. You can also fill in details about your preferences, but you can do this later if you prefer. 
  3. If you would like to use voice commands with Cortana, you will need to calibrate the microphone. Click on the microphone icon to the right of Cortana’s search bar and read through the sentences to set up your microphone.
  4. Cortana will now automatically open whenever you log on. 
Watch the below to see how it works:
How to set up Cortana animated gif

How to personalise Cortana using the Notebook

  1. Click on the Cortana search bar at the bottom of your screen. This will bring up Cortana’s window. Then click on the Cortana icon   to bring up your Notebook. 
  2. The more information you provide Cortana with, the more personalised your experience will be. Click on ‘About Me’ to change the name Cortana calls you and to fill in your favourite places, such as home and work.
  3. Work your way down the list of categories, such as events, finance, and news, and update your information for each one. If you don’t want to receive updates about a subject, you can turn them off by clicking on the top button in each topic and you can turn them back on at any time. For example, you might choose to switch on travel updates if you’ve got a trip planned and want to make sure your flight is on time or there aren’t any traffic delays. Once you’re happy with your changes, click ‘save’ before moving on to the next category.
  4. If you would like to link Cortana to your LinkedIn, Xbox Live, Office 365 or Dynamics CRM, click on ‘Connected Accounts’ and then ‘Connect.’ This will synchronise your accounts across different devices.
  5. If you decide you want to turn off Cortana, click on the Cortana icon and then go to ‘Settings’. Click on the top button to switch it to ‘off’. Disabling Cortana will not erase the information Cortana has about you, so you can turn it back on again at any time without losing anything.
Watch the below to see how it works:
Cortana notebook animated gif

How to use Cortana to set up a reminder

  1. Open Cortana and click on the lightbulb icon at the top left.
  2. Click on the plus sign at the bottom of the window to set up a new reminder.
  3. Type in what you want to be reminded about in the “Remember to…” box. You can also add a person from your contacts list by clicking on the ‘Person’ box, add a place by clicking on ‘Place’ and set a time by clicking on ‘Time’ and selecting the hour and minute.
  4. You can also set up a new reminder by typing in the Cortana search bar or talk into the microphone, starting with “Remind me to.”
  5. If you are signed into your Microsoft account on your phone, any reminders you set on your phone will automatically be synchronized across all the devices your Microsoft account is connected to.
Watch the below to see how it works:
How to set up reminders in Cortana animated gif


Using Cortana to search your computer

  1. Click on the Cortana search bar at the bottom left of your screen or click on the microphone icon.
  2. Type or say the name of what you’re looking for. You can include details such as date or location, for example ‘photos from June’ or ‘photos from London.’
  3. Click on ‘My stuff’ to see the results for files, apps, photos, videos and music across your PC.
Watch the below to see how it works:
Cortana search animage gif


Now we know how to set up and personalise Cortana, as well as use Cortana to set a reminder and search a computer for files.
From here, you might like to learn more about using Cortana to get more out of the internet with Microsoft Edge.

0 komentar:

23.06 Rizky Fauzi 0 Comments

How to use and download apps in Windows 10

Find and install apps with ease in the new Windows store


Windows app store screenshot
‘App’ is short for application and is a program designed to perform a specific function, such as play a game or organise your calendar.
Read on to find out how to:
  • Enhance your computer with apps
  • Use the Windows store to access new apps, games and entertainment

How to access apps in the Windows store

  1. Windows 10 comes with some apps already built in, such as Skype and OneDrive, but there are a lot more available in the Windows store. Whatever you want to do with your computer, there’s an app for it.
  2. To access the Windows Store, click on the Start button   and then select ‘Store.’ Alternatively, click on the Store icon in your taskbar. Windows App Store screenshot
  3. If you know exactly what you’re looking for, type the name of the app in the search bar at the top of the Store window. You will get a number of results related to the term, sorted into apps, games, artists, albums, songs, films, and TV shows. You can filter the results by clicking on the relevant category on the left. 
  4. If you don’t have something specific in mind, you can browse top apps, games and collections by clicking on the different buttons on the Store home page.
  5. Once you’ve found the app you want, you can download it. If it’s a free app, simply click on ‘Free’ to download it. If it’s a paid app, you can either click on ‘Free trial’ to see if you like it or pay to own it. 
  6. Once you’ve purchased or downloaded an app, you can use it on any compatible device you use your Microsoft account to log into, including your phone, laptop, desktop or Xbox.
Watch the below to see how it works:
Windows 10 App Store animated gif

How to purchase music and movies in the Windows store

  1. You can buy music, TV shows, and movies in the Windows store. Simply type in the name of the artist, film or programme into the search bar and click on the one you want from the search result.
  2. Click on the button to purchase it and then fill in your payment details. Your content will be immediately available.
Windows App Store movies screenshot


Now we know how to use the Windows store to purchase and download apps.
From here, you might want to explore the store further to find the most useful and popular apps to get the most out of your device.

0 komentar:

23.05 Rizky Fauzi 0 Comments

How to set up email and calendars in Windows 10

Get yourself set up for ultimate productivity with your email inbox and calendar in Windows 10


Windows 10 email screenshot
Read on to learn how to:
 
  • Locate Mail and Calendar and pin them to your Start
  • Set up Mail and Calendar
  • Get started with Mail and Calendar

Where to find Mail and Calendar

  1. You can find Outlook Mail and Calendar in your Start menu. Click on Start   and select ‘All apps’ at the bottom of the menu.
  2. Calendar is located under the section headed ‘C’ and Mail is found under ‘M’.
  3. Right click or press and hold the app you want to pin and select ‘Pin to Start.’ They will now appear as part of your main Start menu so you don’t have to search for them every time you want to open them.
Watch the below to see how it works:
Pinning Mail and Calendar apps to start menu in Windows 10 animate gif

How to set up Mail and Calendar

  1. When you open up Mail or Calendar for the first time, click on the button marked ‘Get started’.
  2. Mail and Calendar will automatically input all the information from your Microsoft account, but you can also include details from other accounts, such as Google and Yahoo. When prompted to add an account, just input your email address and password to log in and synchronise your information across accounts and you’re all done. Setting up Mail and Calendar in Windows 10 screenshot
  3. If you’d like to add an account later to Calendar, click on the settings button on the bottom left (a cog wheel) and select ‘Manage Accounts’ on the right. Click on ‘Add Account’ and select the type of account you want. Type in your email address and password and it will be included in your Calendar information.
  4. If you’d like to add an account later to Mail, click on the three lines in the top left hand corner and then select ‘Accounts.’ Then click on ‘Add Accounts’ and select the type of account you want. Type in your log in details and it will now be included in your Mail.
  5. Note that you do not have to update account information separately for Mail and Calendar. Once you’ve updated one, the other will automatically synchronise.
See how quick it is to set up your calendar:
 

How to start using Mail and Calendar

  1. You can switch between Mail and Calendar by clicking on the envelope and calendar icons at the bottom left of the window.
  2. To write an email, click on the icon of three horizontal lines at the top left and then select ‘New mail.’ Alternatively, just click on the cross below the three lines. This will open up an email for you to fill in the recipient’s details, title and body of the mail. Once you’ve finished, click ‘Send’ in the top right. Mail set up in Windows 10 screenshot
  3. Any emails you receive will be displayed in the Inbox. Click on the folder icon at the top left side of the window to switch between your ‘Inbox’, ‘Drafts’, ‘Junk’, ‘Sent’ and ‘Deleted Items’.
  4. To input an appointment in calendar, use the options at the top of the screen to take you to the date you want and then click on the box for that date. Fill in the details and when you’re finished, click done to add it in to your schedule.
  5. If you need help at any stage, you can always click on the Menu icon (three horizontal lines) then Settings > Help > Open Help. 
Making a calendar appointment in Windows animated gif

 
Now we know how to set up the Mail and Calendar apps, synchronise them with all our accounts as well as be able to send and receive emails and input appointments into our calendar.
 
Great! Now you might want to go a little deeper into the various features of the Mail and Calendar apps.

0 komentar:

23.05 Rizky Fauzi 0 Comments

How to unlock a Windows 10 computer in new ways via Windows Hello

Understand how to log in to Windows in new ways via Windows Hello


Read on to find out more about:
  • Windows Hello and how it works
  • How to set up Windows Hello and picture passwords on your device

How Windows Hello works

  1. Windows Hello is the latest innovation in protecting your devices. Instead of using a password to sign in to your devices, apps, online services and networks, it uses ‘biometric authentication’. This means that you sign in with your face, iris or fingerprint. You can also use a PIN or even a picture if you prefer.
  2. The Lumia 950 and 950 XL are currently Windows Hello ready, with more devices supporting Windows Hello due to be available in the future. However, even if you don’t have a Lumia 950, you can still set up a unique picture or PIN to log in.
  3. If you decide to stop using Windows Hello, the identifying features of your face, iris or fingerprint will be deleted. This information never leaves your device and Windows does not store it anywhere.

How to set up Windows Hello

  1. If you’d like to set up Windows Hello on your phone, swipe to the ‘All apps’ list from Start   and then go to Settings > Accounts > Sign-in options. If you don’t see an option for Windows Hello, your phone doesn’t support it. You may need to input your PIN to continue. Select ‘Set up’ under Windows Hello and follow the instructions.
  2. If you’d like to set up a picture password or pin on your computer, click on Start   and then go to Settings > Accounts > Sign-in options. If you don’t see Windows Hello as an option, but you’d like to set up a picture password, click on ‘Add’ under picture password.
  3. If you are setting up a picture password on a computer, type in your Microsoft account password and then browse to find the picture you want to use. 
  4. Use your mouse to draw three gestures (circles, straight lines or taps) on the picture. These gestures will become your log in password. You will then be asked to repeat these gestures to confirm. You can start again or cancel at any time.
  5. Once you’re happy with your picture password, click on ‘Finish’.
  6. To turn off Windows Hello, go to Settings > Accounts > Sign-in options and deselect ‘Automatically unlock the screen if we recognise you’ or ‘Remove’ to get rid of a picture password.
  7. If you want to remove your identification data, go to Settings  > Accounts  > Sign-in options and select ‘Remove’ under Windows Hello, select Remove.
Windows sign in screenshot


Now we know how to use Windows Hello and picture passwords to add extra protection to our computers or phones. Feel free to explore other Windows 10 features in our collection of guides.

0 komentar:

23.04 Rizky Fauzi 0 Comments

How to edit and personalise settings in Windows 10

Set things up in Windows 10 to look and feel exactly as you want 


WIndows 10 settings screenshot
 
Read on to learn how to:
  • Change the background image on your desktop
  • Change the colour of the Start menu, the taskbar and other items

How to change the background image on your desktop

  1. You will need to go into the settings menu to change the background image on your desktop. Click on the Start button  and select Settings. This will open up a window with a number of options for you to choose from. 
  2. Click on ‘Personalisation.’ This will take you to a window that allows you to change the background of your desktop.
  3. The top image gives you a preview of how your desktop will look once you’ve finished making your changes. 
  4. The top drop down list lets you choose between a fixed image, a single colour or a slideshow of pictures as your desktop background. If you choose ‘colour’, Windows 10 will show you a number of shades and all you have to do is pick the one you like.
  5. If you want a picture, select the picture option and choose from one of the available Windows 10 images or click on ‘browse’ to select an image from your pictures folder. Once you’ve found a picture you want to use, click on ‘fit’ to adjust the way the image appears on your screen. 
  6. Alternatively, if you’d prefer a slideshow with the pictures changing, click ‘slideshow.’ This automatically defaults to your picture folder, but if you’d like to use a different source, click on ‘browse’ and choose the folder you want Windows 10 to use. You can then set the frequency you want the pictures to change, from every 1 minute through to once a day, set the images to shuffle randomly or rotate in order and, if you’re using a laptop, switch off the slideshow when your machine is running off battery power to save energy.
  7. Finally, you can choose how you would like the images to appear on your screen by clicking on ‘fit’ and selecting an option from the drop down list.
Watch the below to see how it works:
Changing background image in Windows 10 animated gif

How to change the colour of Start and other items

  1. If you want to change the colour of your Start, taskbar and other items, go to Start > Settings > Personalisation and click on the ‘colour’ tab.
  2. If you want to let Windows 10 pick a complementary colour from your background image to use in the Start window, switch the top button to ‘On’ or leave it ‘Off’ to select your own from the options provided. 
  3. If you would like to colour your Start, taskbar, action centre and title bar, click on the button to turn it ‘On’ and select the colour you want. 
  4. If you prefer your Start, taskbar and Action Centre transparent, click on the button to turn it ‘Off.’
  5. Windows 10 automatically updates your machine according to your selection, so once you’re happy with its appearance, simply close the settings window and your changes will have taken effect.
Watch the below to see how it works:
Changing background colour in Windows 10 animated gif


Now that we’ve seen how easy it is to customise the appearance in Windows 10, feel free to experiment with different colours and themes to get it looking exactly the way you want.

0 komentar:

23.04 Rizky Fauzi 0 Comments

Log in to Windows 10 requires a Microsoft account — here's how to make sure you're all set up


Microsoft logo screenshot
Read on to learn how to:
  • find out if you already have a Microsoft account
  • set up a Microsoft account if you don’t have one
  • link your computer to your Microsoft account

How to check if you have a Microsoft account

If you’re using a computer that’s running Windows 10 as its operating system, you’ll need a Microsoft account to log in.
If you have an existing account with Outlook.com, Hotmail, Office 365, OneDrive, Skype, Xbox or Windows, good news — the email address and password that you use to access that account will also work as your Microsoft account. Simply input those same details to log in to Windows 10.
If you don’t have an account with any of the above services, then you don’t currently have a Microsoft account. You’ll need to set one up in order to log in to Windows 10. Follow the below steps to get going.

How to set up a Microsoft account

  1. First, go to Outlook.com and click on ‘Create one!’ to start the process.  Outlook sign in page screenshot
  2. Fill in your first name and surname. The name that you use here will be displayed across all the Microsoft services you use and will be visible to friends, family, colleagues and other Microsoft users. Outlook create an account screenshot
  3. Enter the email address you’d like, e.g. firstname_lastname and choose from the drop down list whether you’d like it to end with @outlook.com or @hotmail.com. Outlook will now check to see if that unique email address is available. If it’s already taken, it will suggest some available email addresses or you can try something different until you find an acceptable email address you’re happy with.
  4. Once you’ve chosen your email address, you need to set up a password. Microsoft requires your password to be at least 8 characters long with at least two out of lower and upper case letters, numbers and symbols.  Your Microsoft account password is case sensitive, so make sure you take note of where you’ve used capital and lower case letters.
  5. Fill out your country/region, date of birth and gender. 
  6. Now add either your telephone number, an alternative email address or both. If you have a problem with your Microsoft account, Outlook will use these contact details to verify your identity to protect your account.
  7. Finally, type in the random characters displayed at the bottom of the screen. There is an audio option if you prefer. 
  8. Choose whether you want to opt in to promotional emails from Microsoft and then click on ‘Create account’ to finish setting up. Outlook sign up security check screenshot
  9. Outlook will now create your email inbox. Select your preferred language and time zone. (The UK is in UTC+00:00) and click on save. You now have a Microsoft account. Outlook sign in page screenshot
 

How to link your computer to your Microsoft account

  1. Click on the Start button and then go to Settings > Accounts > Your account. Windows 10 settings screenshot
  2. Select ‘Sign in with a Microsoft account instead,’ input your Microsoft account password and click ‘next’.  It might take the wizard a moment to prepare the set up, but when it’s ready, enter your Microsoft account email address and password, then click ‘next.’ 
  3. You may need to verify your identity with a confirmation code sent to the email address or phone number you provided earlier when you set up your Microsoft account, so have your phone or email account to hand. If they’re not available, select ‘I can’t do this right now’ and return to the set up wizard when you’re ready. Once you’ve inputted the code, click on ‘next.’
  4. Finally, click on ‘switch’ to finish the set up. Windows 10 will set up your new Microsoft account. This will not affect your files. 

In summary

We've now completed the process of setting up a Microsoft account. The next time you sign in to Windows 10, use your Microsoft account name and password to log in.
Your Microsoft account will synchronise all the machines connected to that account, so look out for the changes next time you log in to a different device.
Now, why not explore some wider features of Windows 10? 

0 komentar:

23.03 Rizky Fauzi 0 Comments

A look at some of the more advanced features of Microsoft's new web browser


Microsoft Edge screenshot
Microsoft Edge is Microsoft’s latest web browser. It features all the basic functionality you’d expect from a browser, but it also contains a number of new features to enhance your online experience
Read on to learn how to:
  • make direct notes on web pages using Edge's 'read and write' feature
  • use Cortana to assist your web browsing
  • use the Hub to keep track of your online activity

How to make notes on web pages

  1. Microsoft Edge allows you to write, scribble, make notes and highlight on any web page. You can also save your annotations for future reference or forward them on to someone else. To do this, click on the ‘Make a web note’ icon at the top right hand corner of the screen.
  2. When you are in the web note screen, you have a number of options at the top left. Select the ‘Pen’ (first icon) to write. You can change the colour of ink and size of nib by clicking on the little arrow to the bottom right of the pen image.
  3. Select the ‘Highlighter’ (second icon) to highlight. Again, you can change the colour of the highlight and size of nib by clicking on the little arrow to the bottom right of the highlighter image.
  4. Delete all the ink on the screen by clicking on the eraser (third icon).
  5. Click on the ‘Type a note’ icon (fourth icon) to open up a box for you to type in.
  6. Click on the copy icon (fifth icon) to click and drag to create a square over a section of the web page you’d like to copy.
  7. If you’d like to save your notes, click on the save icon at the top right hand corner of the window.
  8. If you want to share your notes, either via email or by using OneNote, click on the share icon at the top right hand corner.
  9. When you’ve finished making notes, just click exit to return to regular web browsing.
Watch the below to see how it works:
Writing on the web feature in Microsoft Edge

Using Cortana with Microsoft Edge

  1. If you have Cortana enabled on your machine, you can use it to help you learn more about the sites you’re visiting. To switch on Cortana in Microsoft Edge, click on the icon in the top right hand corner (three dots), and click on ‘Settings’ then scroll down and click on ‘View Advanced Settings.’ Scroll down and underneath ‘Get Cortana to assist me in Microsoft Edge’ click the button so that it’s set to ‘On.’
  2. If there is a word or phrase you come across in Microsoft Edge you would like to know more about, highlight it by clicking your mouse and dragging it across the phrase and then either press and hold it or right click it. Select ‘Ask Cortana’ to find out more about the subject
Watch the below to see how it works:
Setting up Cortana with Edge animation
 

How to use the Hub to organise your web browsing

  1. Access the Hub by clicking on the icon with three horizontal lines. 
  2. Click on the star to view sites you’ve added to your favourites list. 
  3. If you’d like to import favourites you’ve set up on other browsers, click on ‘Import favourites’ and select the browser you’d like to copy favourites from.
  4. Click on the reading list icon to access your reading list.
  5. Click on the history icon (a clock with an arrow around it) to view the sites you’ve visited in a set period. Click on the little arrow next to ‘last hour’ to change how far back you want to see your browsing history.
  6. Click on the icon of a downward pointing arrow to view all the files you’ve downloaded.
Watch the below to see how it works:
Using the Hub in Microsoft Edge animated gif


We've now run through how to use Microsoft Edge to navigate around the internet.
 
We can adjust the appearance of web pages to suit our needs, make notes and add pages to our reading list and organise all our browsing in your Hub. We can also use Cortana to help us learn more about the sites we visit.
 
From here, you might want to delve deeper into the various features Microsoft Edge has to offer.

0 komentar:

23.03 Rizky Fauzi 0 Comments

How to browse the web in Windows 10: Microsoft Edge basics

A run-through some of the key features found in Microsoft Edge


Microsoft Edge welcome message screenshot
Microsoft Edge is Microsoft’s latest internet browser. It features all the basic functionality you’d expect from a web browser, but it also contains a number of new features.
Read on to learn how to:
  • search the internet using the address bar
  • set up and access reading lists
  • simplify the appearance of a web page for easier reading

How to search faster from the address bar

  1. To open Microsoft Edge, click on the  icon on your taskbar or desktop.
  2. If you want to carry out an online search, simply type in the topic in the address bar (where you write the name of the site you want to visit). This will give you a range of answers without your having to visit a search engine.
Watch the below to see how it works:
Microsoft Edge search


How to set up and access reading lists

  1. If there’s an article or web page you’d like to read, but you don’t have time right now, you can set up a reading list in Microsoft Edge. This will synchronise across all your Windows 10 devices if you’re signed in with your Microsoft account. 
  2. On the top right hand of the Microsoft Edge window, click on the star. 
  3. Click on the right hand icon labelled ‘Reading list.’ 
  4. Give the web page a name and then click ‘Add.’  Reading list set up in Microsoft Edge
  5. When you want to read an item in your reading list, click on the icon with three lines in the top right hand of the screen. This will display everything you’ve added to your reading list.

How to simplify the appearance of a web page

  1. If you prefer a clean, easy to read layout for your web pages, click on the icon of a book   in the top right hand corner of Microsoft Edge to turn on reading view. This will bring the text to the front and centre of the page, making it easier to read.
  2. Adjust the reading view style and font size to suit your needs by clicking on the icon with three dots (‘More’), selecting ‘Settings’ and scrolling down to the reading options.
  3. To exit reading view, simply click on the book icon again.
Watch the below to see how it works:
Reading list view in Microsoft Edge


In summary

That's a simple overview of some of the basic features of Microsoft Edge. Read through some of the more advanced features of Microsoft's latest web browser, plus other aspects of Windows 10, in our wider collection of Windows 10 guides

0 komentar: